

Save an Agent preset
Save and test reusable instructions, tools and environment configuration.
Use an Agent when you want to reuse configuration. For execution without a preset, start with the API quickstart.
1. Open a Project
Sign in at cloud.mosoo.ai. mosoo creates a Default Project for a new account. Use the Project switcher to create or open another Project when you need a separate resource and usage boundary.
2. Add a Provider key
Open Config → Providers. Add a key for the runtime you plan to use and run the optional connection test. A ready runtime appears at the top of the page.
Provider credentials belong to the active Project. Saved keys are masked; exported Agent packages do not contain them.
3. Create the Agent
Open Agents → Create agent, enter a name, and choose a runtime.
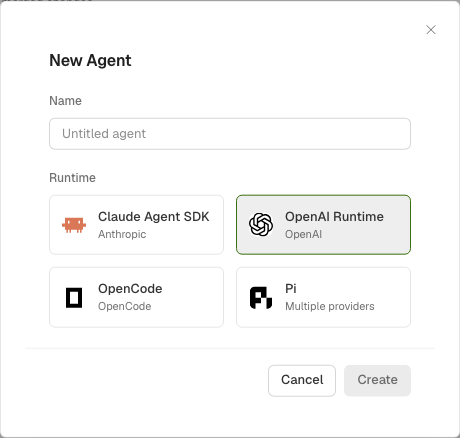
- Claude Agent SDK resolves an Anthropic key.
- OpenAI Runtime resolves an OpenAI-compatible key and requires a compatible Responses API endpoint.
- OpenCode can use supported provider credentials, including custom OpenAI-compatible endpoints. When the Project has only a custom OpenAI-compatible Provider, OpenCode remains the default.
- Pi is an explicit runtime choice for compatible built-in and custom Project providers. Select the model protocol implemented by a custom endpoint; Pi supports Chat Completions, Responses, Anthropic Messages, and Google Gemini.
4. Configure behavior
In Preview, set the model and system prompt. Add Skills, MCP servers or a custom Environment only when the preset needs them.
5. Test the preset
Send a representative task in the left Preview pane. Verify the answer, tool calls, files, and failure behavior. Use Logs for execution details and Cost for model usage.
6. Reuse the saved preset
Save the preset for use with configuration: {type: "agent", agent_id: "your Agent ID"} in v2. Publishing remains optional for this path. To use a published delivery flow, open Publish and publish the draft; existing Sessions keep their admitted configuration.
After publishing, choose a delivery surface:
- Thread — start work inside the mosoo console.
- API Access — obtain the Agent ID and call the Public Thread API.
- Instruction for LLM — copy Agent instructions for supported coding-agent workflows.